
Absynth 6 is the latest version of the legendary semi-modular hybrid synthesiser – and it’s more powerful and easier to use than ever before.
Offering unparalleled sound-sculpting capabilities, Absynth is the ideal instrument for sound designers looking to push the envelope and create unique, evolving soundscapes for film, television, or games.
In this guide to Absynth 6 sound design, we’ll show you how to make an evolving soundscape from scratch, master flexible modulation with an MSEG tutorial, and discover polyphonic aftertouch assignment.
Jump to these sections:
- What is an evolving soundscape?
- How does Absynth’s envelope system work?
- How can MPE be used for sound design?
- Designing evolving soundscapes
Follow along with the reimagined Absynth 6.
Discover Absynth 6
What is an evolving soundscape?
An evolving soundscape is a continuously changing sonic environment where textures, tones, and dynamics shift over time. In addition to styles of music like ambient, these are commonly used in narrative forms of media like film, television, and games to give scenes an extra dimension of atmosphere.
Hans Zimmer’s “Bene Gesserit” from his Dune (2021) soundtrack is an example of a piece of music that uses an evolving collage of sounds to create a dramatic atmosphere.
How does Absynth’s envelope system work?
Absynth 6’s MSEG (Multi-Stage Envelope Generator) system is an advanced modulation tool that allows for evolving, detailed control over parameters. MSEGs use breakpoints, each with adjustable level, timing, and slope, to create complex modulation shapes.
These envelopes can be edited freely, looped, and synced to your DAW’s host tempo. As MSEGs can be assigned to practically any parameter in the synth, they’re powerful tools for creating intricate, rich, and evolving textures.
This flexibility makes Absynth’s MSEGs ideal for organic soundscapes, evolving pads, and cinematic timbres that change dramatically over time.
How can MPE be used for sound design?
MPE (MIDI Polyphonic Expression) allows each note in a performance to carry independent expressive data, such as pitch bend, timbre, and pressure. This adds additional dimensions of control over traditional MIDI, and by mapping these parameters to filters, modulation depths, or synthesis engines, sound designers can create fluid, organic sounds.
Let’s get started with some Absynth 6 sound design and see how we can integrate MPE synth workflow.
Designing evolving soundscapes
1. Sound Sources and MSEG modulation
Absynth is a semi-modular, hybrid synth. This means that it’s capable of multiple sound-generating techniques in a flexible manner, making it very powerful. To get the most out of this formidable architecture, it helps to work with a degree of intentionality, so let’s begin by simply creating a fundamental character for our sound.
The initial patch we encounter when opening Absynth is a simple sine tone created by Channel A’s Sound Source.

Channel A’s Sound Source
Native Instruments · 01 A pure sine tone
This sustained tone isn’t particularly aesthetically pleasing, so let’s use a Multi-Stage Envelope Generator to imbue it with some organic-feeling movement. To bring up the MSEGs, click the Envelope button at the top of the display.

The Envelope button
Here you can see that the initial preset already has MSEGs assigned to the amplitude of Oscillators A, B, and C. Currently, these aren’t particularly dynamic – they stay at maximum value until the release stage. This is similar to a traditional ADSR envelope with a high sustain and medium release.
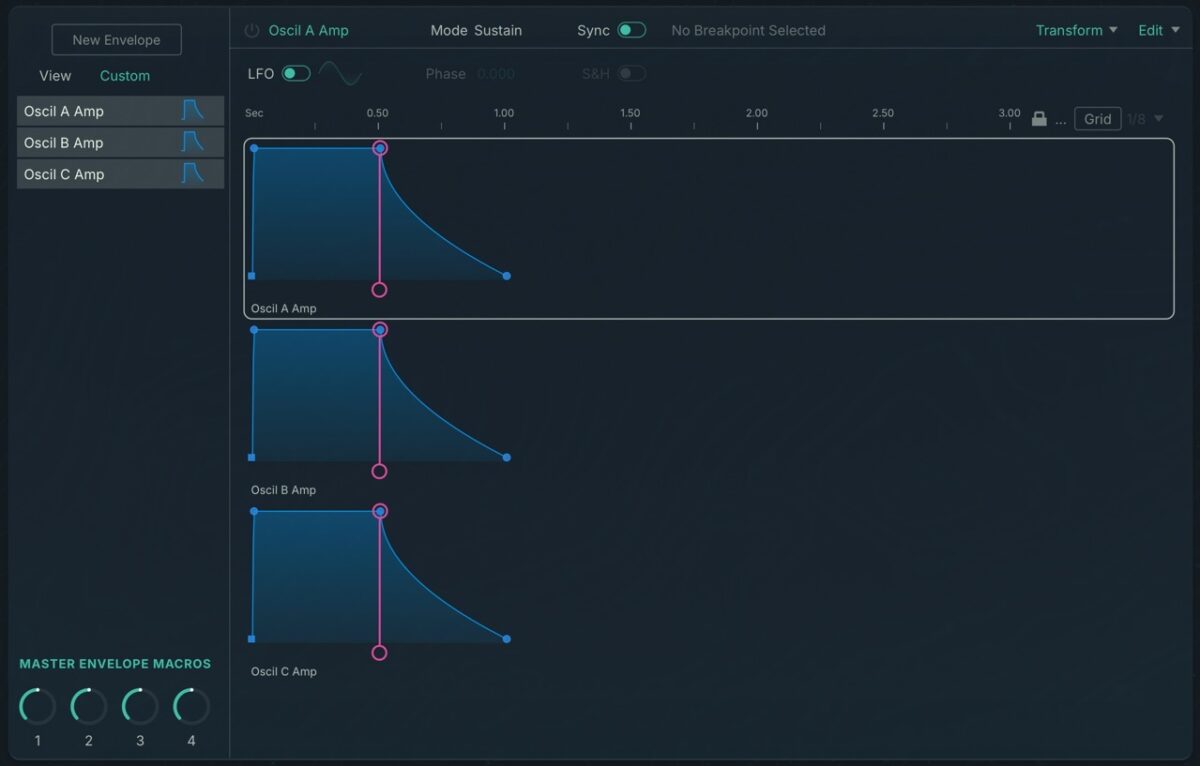
The initial Amplitude envelope
We can adjust the shape of Oscillator A’s Amp envelope by moving around its circular breakpoints. Drag out the Oscil A Amp envelope’s breakpoints to the bottom of the panel at around 3 seconds and 1.5 seconds as illustrated.

Creating a smooth fade
Native Instruments · 02 Creating a smooth fade
We can make the amplitude modulation more involved using the MSEG’s LFO capabilities. Distinct from the synth’s main LFO panel, the MSEG LFO allows us to apply LFO-like movement directly to the envelope waveform. Click the sliding button next to where it says LFO to activate it, then click the waveform and select Fifth from the list of available waveshapes.
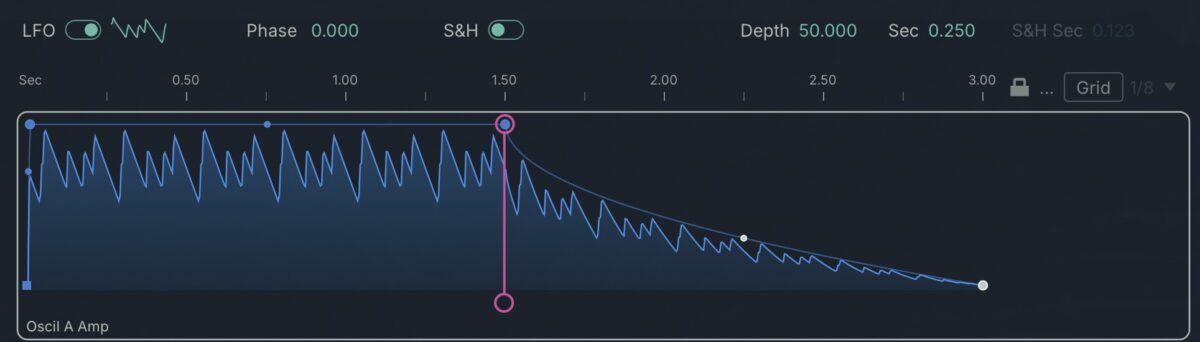
Applying an MSEG LFO
We can keep this movement going by putting the envelope in Loop mode. To do this, select Sustain and change the mode to Loop.

Changing to Loop mode
Now, when a sustained note is played, the envelope will loop.
Native Instruments · 03 The looping envelope
2.Enhancing the sound with FX
We now have a more interesting basis for a sound, but it is still extremely raw, and this is where Absynth’s FX module comes in.
Return to the Patch page using the button at the top of the interface.

The Patch button
Activate the FX module at the bottom right-hand corner of the interface by clicking the circular icon on its left-hand side. The default effect is the grain-based Aetherizer, which gives our patch a dreamlike quality. We can set specific parameter values by double-clicking a parameter and entering a value with the keyboard. Use this method to set the Feedback to 60.

Setting up the Aetherizer
Native Instruments · 04 Aetherizer
The Aetherizer gives our patch an ethereal, ambient tone, but looping envelope aside, it’s relatively static-sounding. Let’s use an insert to change the timbre of the sound over time.
3. Adding an Insert to develop timbre
We can develop the timbre of this tone with one of Absynth’s Inserts. To activate an insert, we click the circular icon on the left-hand side of the module, then click the filter name to bring up a list of the available filters. Let’s select Waveshaper.

Applying a Waveshaper
Change the Waveshaper waveform from Sine to Triangle with the dropdown menu.

Changing the Waveshaper to triangle
This affects the timbre of the sine oscillator, giving us a pleasing “flutey” tone.
Native Instruments · 05 Sine with Waveshaper
If you try sweeping the Phase parameter while you play the patch, you’ll notice that it changes the tone of the resulting output significantly. Let’s use an MSEG to automate this.
4. Developing the sound over time
In the Envelope panel, click where it says New Envelope to add an envelope.

Adding a new envelope
You’ll be presented with a menu where you can choose which parameter you’d like to assign to the envelope. Select the A1 module and the WS Phase A1 parameter. Then click the Add button to add the envelope.

Selecting a parameter
Drag on the timeline to zoom the envelope out, and copy the envelope setting we’ve used here to subtly increase the Phase over time.

Creating a slow modulation
Native Instruments · 06 Creating a slow modulation
Now we have more of an evolving sound, but it’s still quite simple. Let’s add another layer to give us something more complex.
5. Adding another channel
Activate the sound source on Channel B, then click the oscillator type, and select FM Oscillator from the list of available oscillator types.

Changing the sound source type
Turn its pitch down to -12, and set the FM index to 6.5.
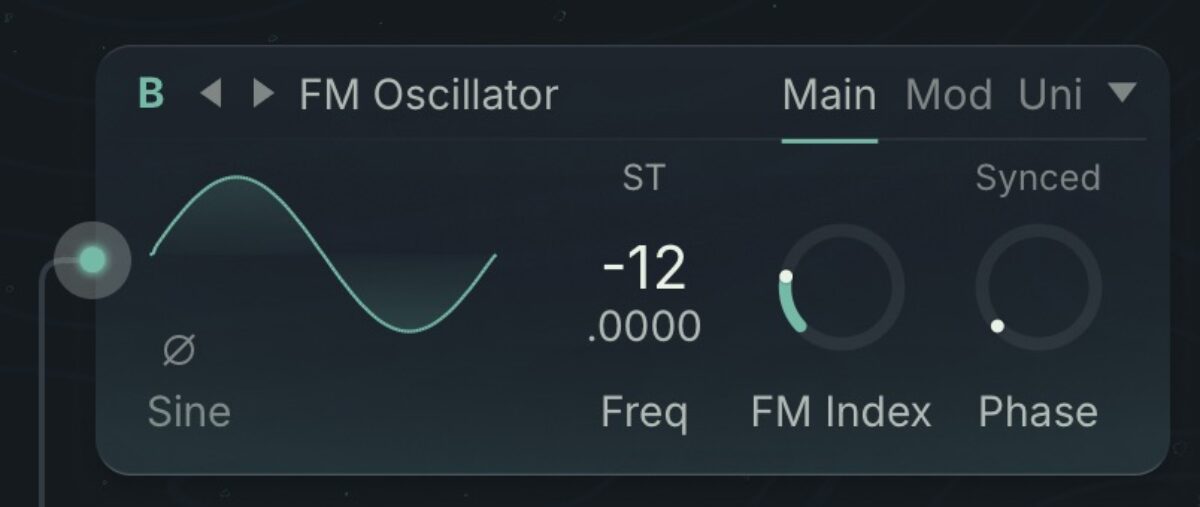
Setting up the FM oscillator
Native Instruments · 07 Setting up the FM oscillator
In the envelope panel, add another new envelope, and this time set it to modulate Channel B’s volume.
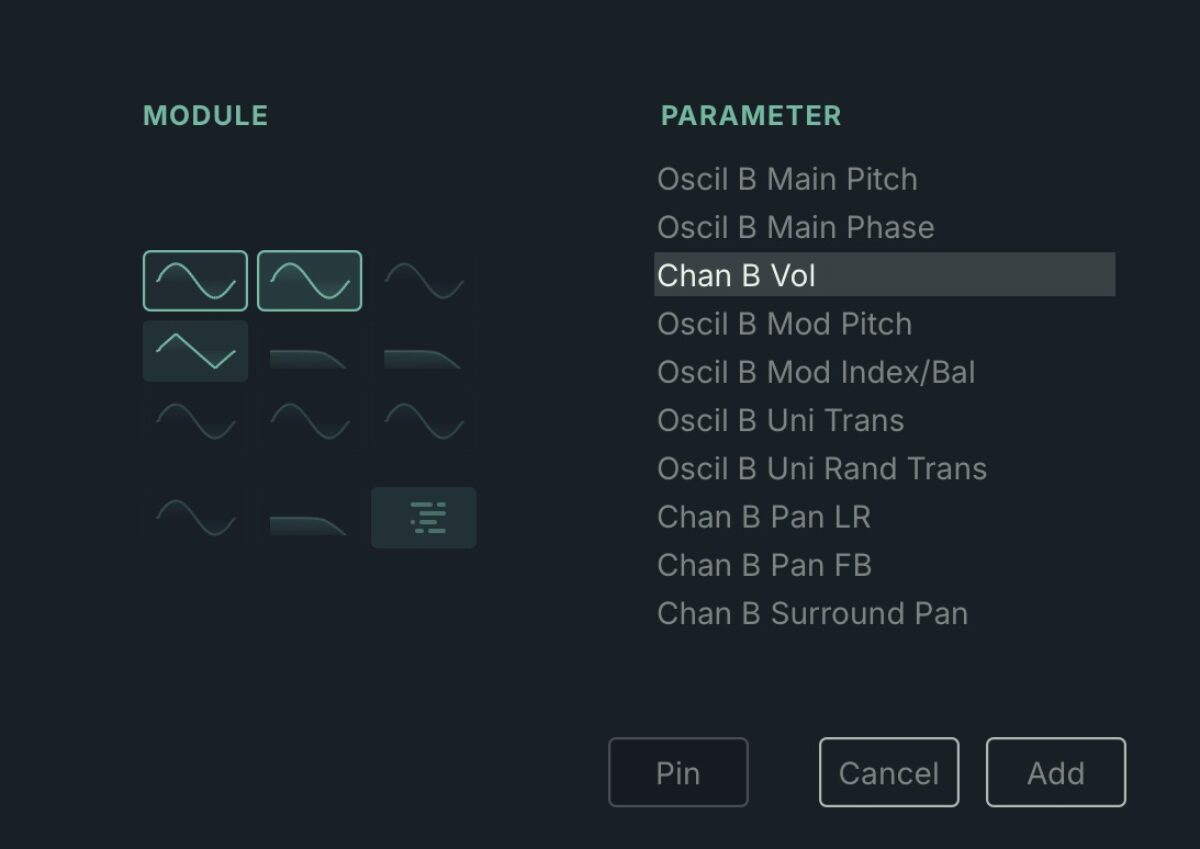
Setting up an envelope to modulate Channel B’s volume
Click the background of the envelope to make sure no breakpoints are selected, then click the Transform button and select Generate AR Pulse.
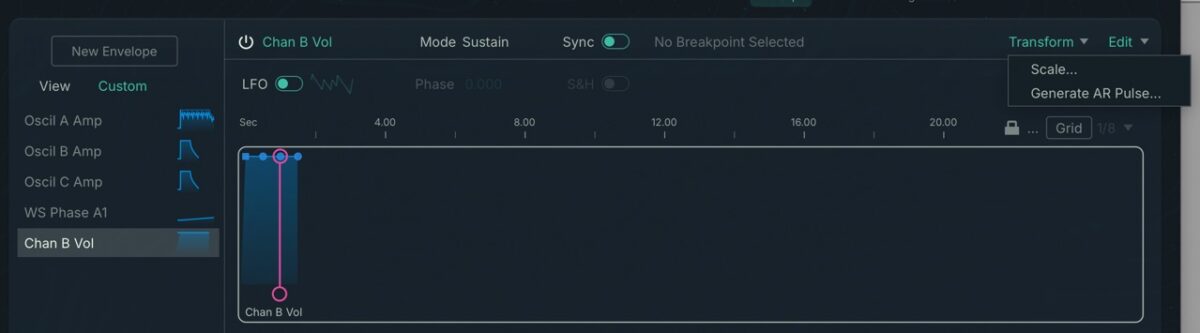
Selecting Generate AR pulse
You’ll be presented with a screen where you’re given parameters for the automatic generation of an envelope. Let’s stick with the default parameters. Click Apply to generate the envelope.
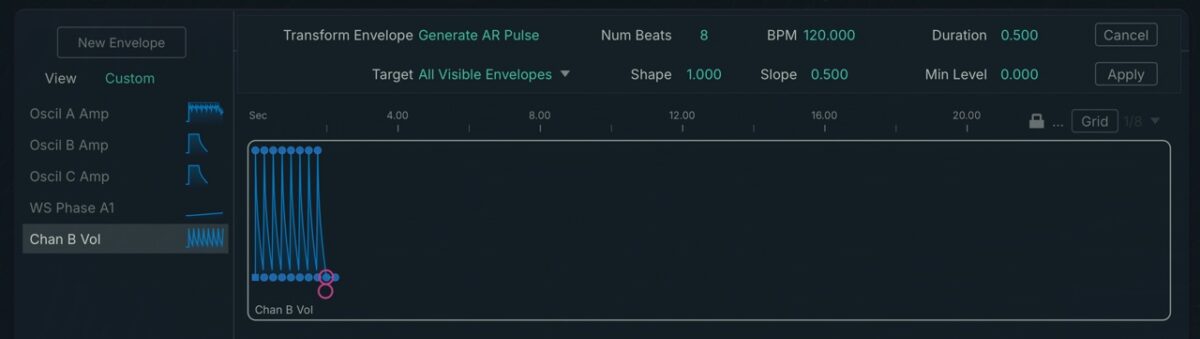
Generating the AR Pulse
Set the envelope’s mode to Loop, this gives our FM oscillator a constant rhythmic movement.

Looping the envelope
Native Instruments · 08 Rhythmic amplitude modulation
Back in the patch page, activate the first insert and set it to Freq Shift.
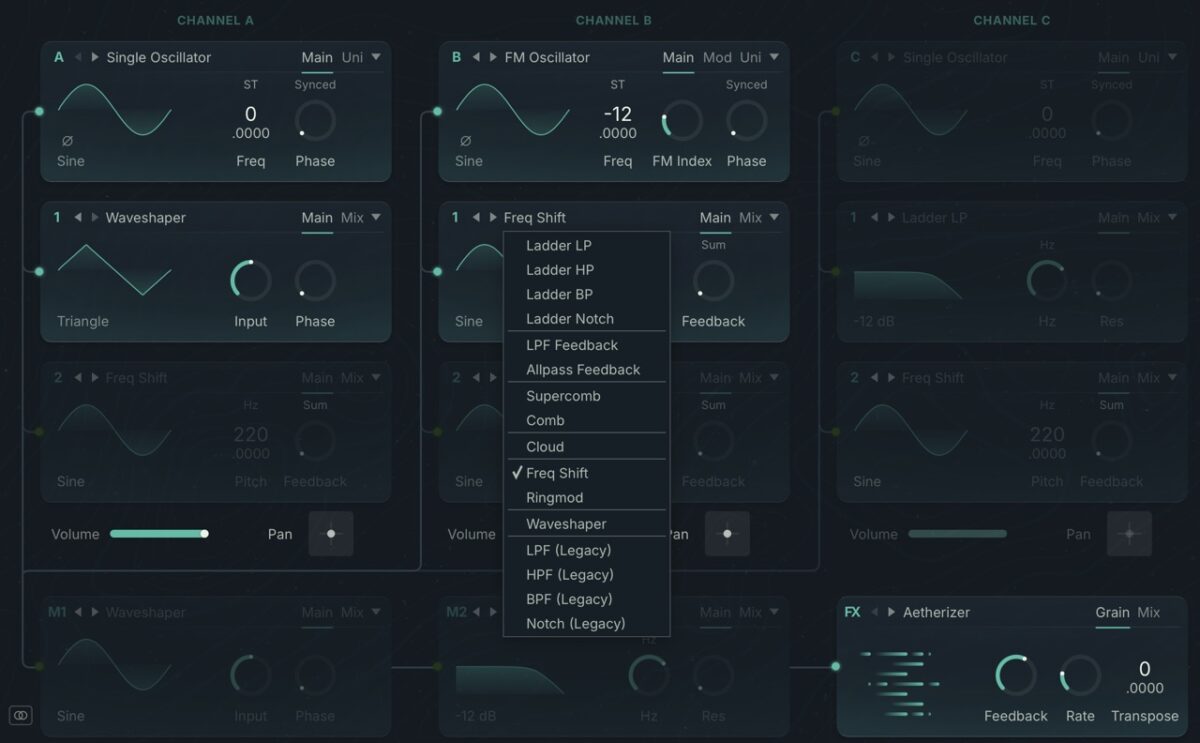
Activating a Frequency Shift Insert
Set the frequency to 800 Hz and the feedback to 100.
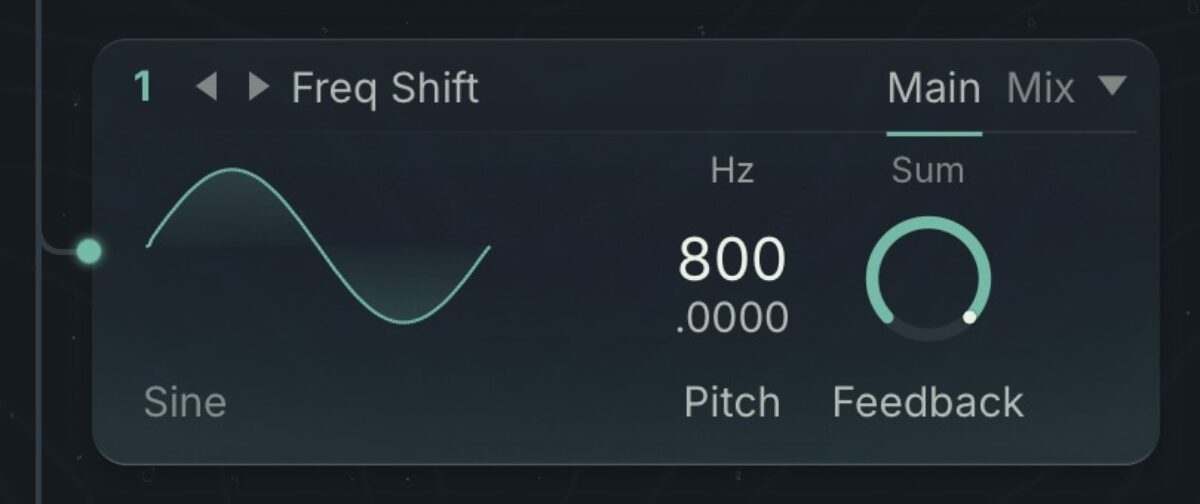
Setting up the Frequency Shift insert
Native Instruments · 09 Oscillator with Frequency Shift
Set the volume fader below to 90 to balance this element with the first channel.

Balancing the channels
Now, in the envelope view, create a new envelope to modulate the Frequency Shifter’s pitch slowly over time.

Modulating the Frequency Shifter pitch
Native Instruments · 10 Frequency shifting over time
We can add more movement to the sound using the synth’s dedicated LFOs. Let’s try that now.
6. LFO Modulation
Click the LFO button at the top of the interface to bring up the LFO View.

The LFO view
Set the first LFO on the left’s waveshape to Saw, and turn up the time to 15 seconds.
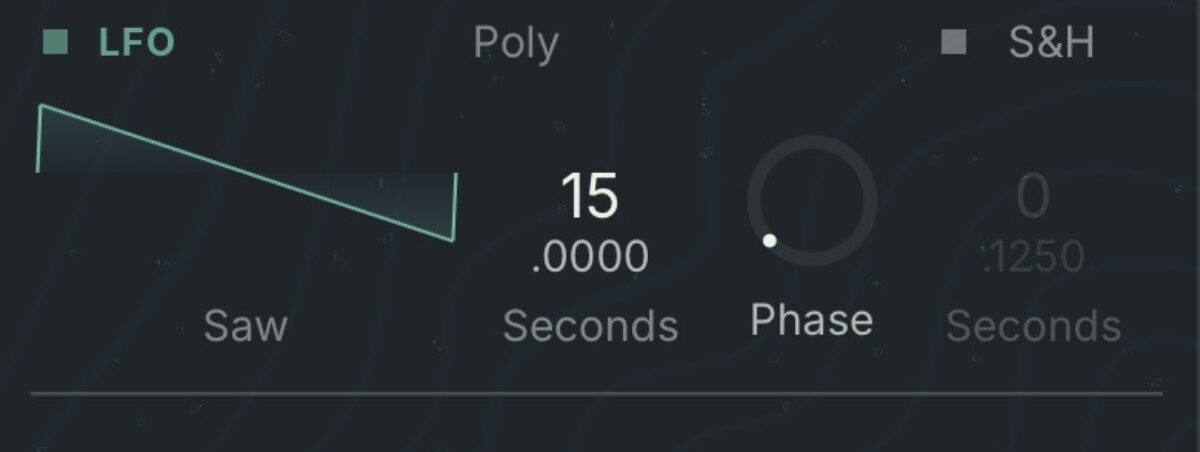
Setting the LFO time
Now, turn up the Pitch horizontal fader to apply it to the synth’s pitch. Let’s go for a setting of 24.000. Activate the A button so that this pitch modulation applies to Channel A.

Assigning pitch modulation
This creates a dramatic change to the sound, turning it into something less musical and more atmospheric.
Native Instruments · 11 Pitch modulation
Another way to modulate the sound is to use polyphonic aftertouch. Let’s set up polyphonic aftertouch modulation now.
7. Polyphonic aftertouch modulation
Let’s set up polyphonic aftertouch pressure to control the volume of the second channel.
Click the Assign button at the top of the interface to bring up the Assign view.

The Assign view
In the panel at the top left-hand corner of the interface, select Aftertouch, then click the Polyphonic Aftertouch button in the main panel.

Activating Polyphonic Aftertouch
To assign polyphonic aftertouch to a parameter, click the Add button next to where it says Parameter.

The Add button
Select Oscil B Amp from the list that appears to assign polyphonic aftertouch pressure to Oscillator B’s amplitude.
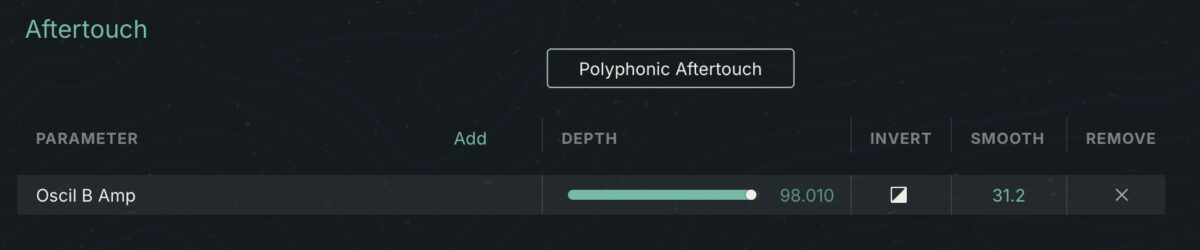
Assigning Polyphonic Aftertouch
You can now use Polyphonic Aftertouch pressure to control the volume of Oscillator B, giving you another dimension of control over the sound.

Polyphonic Aftertouch pressure modulation
Native Instruments · 12 Rhythmic amplitude modulation
8. Creating new sounds with Sound Mutation
Finally, let’s check out Sound Mutation. This is an easy way to generate sounds from an existing patch. Sound Mutation tools can be found in the Browser. Click the Browser button at the top of the interface to bring up the Browser view.

The Browser view
The Sound Mutation parameters can be found at the bottom of this page, and can be expanded with the arrow icon. Here you can lock certain elements, tweak the amount of mutation, and look at your (intriguingly-titled) Mutation History.
To mutate a sound, simply click the Mutate button.
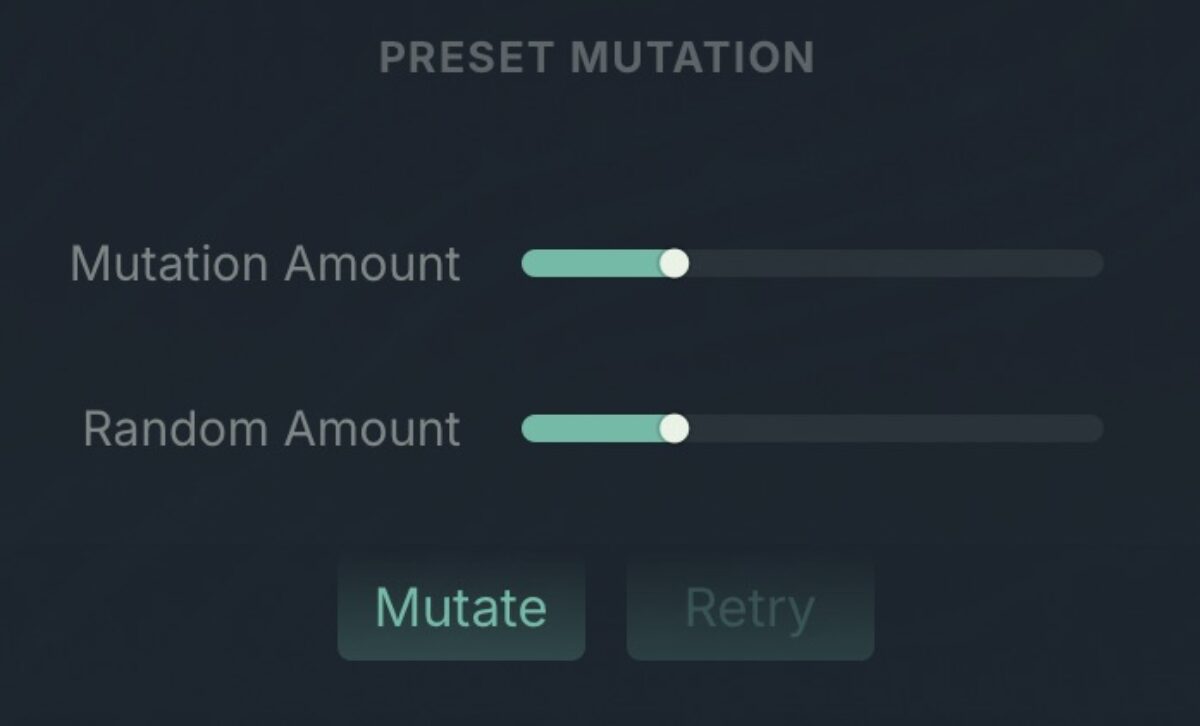
The Mutate button
Thanks to Sound Mutation’s random factor, there’s no way to know exactly what you’ll get when you mutate a sound. Here’s an example mutation from the patch we just created.
Native Instruments · 13 A mutated patch
If you don’t like a particular mutation, you can click the Retry button to get as many alternative versions as you like. You can also revisit all the mutations you’ve created with the Mutation History.
9. Setting up Surround Sound
To configure Absynth 6’s surround settings, click the menu button in the top left-hand corner of the interface, and select Surround Configuration.

The Surround Configuration option
In this menu you can pick various surround configurations from two to eight speakers, and also select which channel will be used for Low-Frequency Effects (LFE).

The Surround Configuration menu
Once you’ve chosen your surround settings, open the Effects View. Here you can activate the Surround section by clicking its power button.
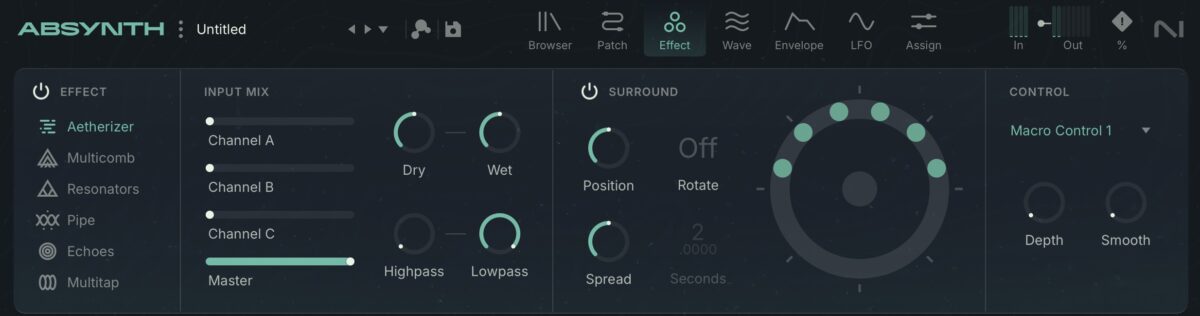
Activating the Surround section
After switching the Surround switch in the top left corner on, up to six green dots appear in the ring to the right, each of them representing one channel of the current effect. You can allow the effect channels to automatically change their position: Activating the Rotate switch routes an internal LFO to the Position value and makes the position markers move around on the circle.

Activating rotation
You can control the surround position, spread and speed of the channels with the Position, Spread and Seconds parameters respectively.
10. Assigning MIDI Polyphonic Expression
To assign MIDI Polyphonic Expression (MPE) to a Macro in Absynth 6, open the Assign View, then select the Macro control you’d like to assign in the list on the left-hand side of the interface.

Selecting a macro
Now in the Map MPE to Macro section on the right you can select Pressure or Slide to Modulate the Macro, and a horizontal Depth fader that controls the intensity of the effect.

Selecting MPE mapping
Start creating soundscapes with Absynth 6 today
In this tutorial, we’ve seen how you can start creating your own soundscapes from scratch using Absynth 6’s Oscillators, Inserts, Effects, MSEGs, LFOs, modulation assignments, and Sound Mutation.
Dive into Absynth 6 to discover these features and create unique soundscapes today.
Discover Absynth 6
The post How to design evolving soundscapes: a sound designer’s workflow with Absynth 6 first appeared on Native Instruments Blog.